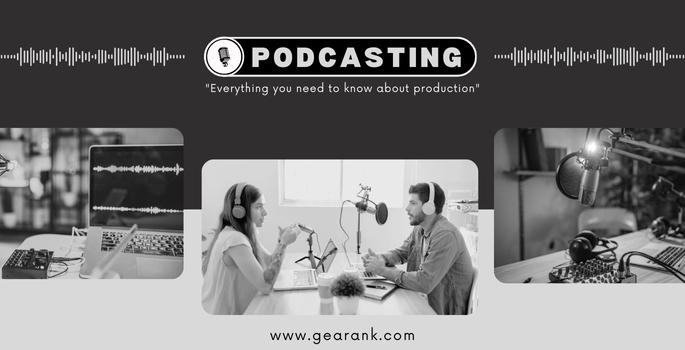
What do you Need for a Podcast? We will Tell you Everything
Podcasting has been around for 20 years, with the term coming from combining "iPod" with "broadcast." Today, podcasting is a ubiquitous media format. Modern podcasts include the Lex Fridman Podcast and the most successful podcast program, the Joe Rogan Experience. Across the globe, there are more than 460 million podcast listeners, and the number is still growing.
The beauty of podcasting is that you can talk about any topic under the sun. If you're a good conversationalist and want to start your own podcast, you may already have great ideas and commentaries in mind. The only thing left is to find the best equipment for your setup.
At Gearank, we don't just answer "What do you need for a podcast?" by presenting the best beginner kits for podcasting. Instead, we delve into the technicalities of each piece of equipment and offer a comparative analysis of its pros and cons. We aim to help you find the best podcasting equipment for your setup.
Let's get started.
Table of Contents
Part 1: What Do You Need For A Podcast? Equipment Essentials
To determine what you will need, simply follow this podcast equipment list:
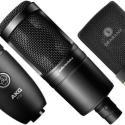
A Podcast Microphone
When recording a podcast, using a good recording device is crucial. While you can use your laptop's built-in mic, investing in a dedicated microphone for better sound quality is always better. If you plan to have co-hosts, you will need multiple microphones.
Having high quality audio is the most important aspect of a good podcast setup. It's essential to avoid any background noise that can distract your listeners. If you read the comments section of any video on YouTube, you will find people commenting on the audio quality. Hence, choosing the right microphone is important to ensure pristine studio quality audio.
There are two types of microphones to consider when choosing the best podcast equipment for your podcast: dynamic and condenser mics. Let's take a closer look at the pros and cons of each:
Condenser microphones are designed to capture a wide range of frequencies and dynamic levels, delivering exceptional sound quality. However, they are more fragile than other types of microphones due to their semi-exposed diaphragm. Condensers can capture every detail of the voice, from the highest to lowest frequency and volume, making them ideal for controlled settings. However, they are less reliable in untreated recording environments and are generally more expensive than other types of microphones.
Dynamic microphones, on the other hand, have a slightly narrower frequency response and lower sensitivity. They don't pick up soft sounds easily but respond well to the voice and less with noise. Dynamic mics are also more resilient than condensers and can withstand bumps, making them ideal for environments where acoustics are less than ideal.
The sensitivity of dynamic vs condenser microphones varies depending on their polar pattern, which is the magnetic field around the mic that determines which part of the mic is most sensitive to sound and which part rejects sound. Condensers tend to be all-encompassing (omnidirectional), while dynamic mics isolate sounds coming directly but reject sound at the sides and back (cardioid).
This is just a summary, but if you want to learn more about microphones and polar patterns, we have an article dedicated to the topic.
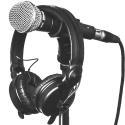
Headphones
When choosing headphones for podcasting, choosing ones that allow for clear and transparent sound is important. This means that you should be able to hear your own voice and the voices of any co-hosts as accurately as possible. Headphones that can produce sound in this way are called monitor headphones.
There are two types of monitor headphones available, but for podcasting, it's recommended that you use closed-back headphones. Closed-back headphones are better at isolating sound, which can be helpful if you're recording in a slightly noisy environment. However, open-back headphones are also a suitable option, as long as you keep in mind that they won't be able to block out ambient noise.
If you're just starting, opting for inexpensive monitor headphones such as the Audio Technica ATH-M20x or M30x is a good idea.
What if I don't want to use headphones in podcasts?
Some podcasters choose to use headphones, while others do not. Listening to your own voice on headphones can be disorienting since it sounds different from what you hear in your mouth. However, you should use headphones if you are running a podcast with no crew.
Headphones help you monitor the audio quality of your podcast in real-time while recording. By listening to yourself and your co-host, you can adjust the audio levels on the fly, which means less time spent editing in post-production.
Therefore, it is best to have headphones ready. If you choose not to use them, you will need at least one person to monitor the sound quality.
A Computer
You will need a computer to serve as your workstation to record and edit your podcasts. The majority of the audio processing for your podcast will be done through a digital audio workstation (DAW). As a result, you will require a fast and dependable Mac or PC to handle the audio processing.
For recommended desktop or laptop PC specs:
-
Processor: Intel i7 11th Gen
-
16GB RAM
-
DAW: Any DAW like Pro Tools, Studio One, and Reaper
For starter desktop or laptop PC specs:
-
Processor: Intel i5 8th gen onwards
-
8GB RAM
-
DAW: Any DAW like Pro Tools, Logic Pro, Studio One, Reaper
PC users are recommended to use the computer devices they are familiar with. They should initially learn to manage RAM and resources and upgrade the specs over time.
For recommended desktop or laptop Mac specs:
-
Processor: M2 Chip
-
16GB RAM
For starter desktop or laptop PC specs:
-
Processor: M1 Chip
-
8GB RAM
It is possible to upgrade Apple products in a different way than you can do with a PC; the former lacking the modularity of a bespoke PC build. Nevertheless, the latest Apple silicone chip on Macs enables smooth processing and editing of audio. Although the Mac lacks expandability, it compensates for it with a more streamlined and unified interface.
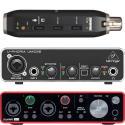
Audio Interface
A USB audio interface is a device that connects your cables, microphones, and headphones to your recording and editing software. It acts as a bridge between the physical sound and digital data. It converts the analog signal into digital data, which can be saved as a digital format file that can be uploaded to various platforms such as YouTube, Spotify, and Apple Podcasts.
Different types of audio interfaces are available in the market, such as USB mics, dedicated audio interfaces, and mixers with built-in audio interfaces.
A USB microphone is a standalone mic that has a built-in analog-to-digital converter. It's an audio interface with one input and one output, mainly used for solo or duo podcasts. It's easy to use, plug-and-play, and convenient, making it the most straightforward device for a podcast starter kit.
However, USB mics have a downside as they don't offer expandability and may produce more static noise than XLR mics. We'll cover both USB and XLR connections later in this article.
With a dedicated audio interface or an audio mixer / audio interface, you'll have the option of expandability. Cheap audio interfaces allow you to connect 2-4 mics simultaneously, making them perfect for multiple guest appearances.
Some audio interfaces, like those in the Focusrite or Presonus line, come with a software mixer that allows for real-time volume level control.
The main difference between a mixer and an audio interface is that the former provides tactile control over volume levels, while the latter requires level adjustments in the DAW.
Digital Audio Workstation
Digital audio workstations are widely used in music production, but they are also viable for use as podcast recording software. A good DAW is needed for recording, editing, and multi-track recording of audio and can also remove unwanted sounds. Below is a list of some free and paid options to help you get started, all of which should work with common podcast recording equipment.
Free DAWs
-
Garageband (Mac)
-
Reaper (Unlimited trial)
-
Cakewalk (Windows)
-
Pro Tools Intro
Paid DAWs
-
Pro Tools
-
Logic Pro (Mac)
-
Adobe Audition
-
Hindenburg Journalist
The following recording and editing software will provide you with the necessary tools for basic operation. Podcast recording and editing is relatively straightforward, as long as you have good room acoustics. Typically, post-processing won't pose significant issues. However, things can get complicated if the recording environment has excessive ambient and background noise. Such noise might distract your listeners.
Internet Connection
It is important to have a stable internet connection when uploading your podcast. Most podcasts are at least 30-40 minutes long, if not longer. Therefore, a faster and more reliable internet connection may be required. This is particularly important when recording with remote guests and a podcast host who is far away.
Part 2: Acoustic Treatment
Acoustic treatments help shape the reverberations or echoes of a specific room or venue. They are commonly used in recording studios and include foam, bass traps, and mineral wool. These materials absorb or diffuse sound depending on the density.
Proper acoustic treatment is crucial if you want to achieve a high-quality podcast sound. It can even create a sense of intimacy in the dialogue by eliminating distracting ambient noise.
This is just a brief introduction to soundproofing, and many more techniques are available. However, even with a limited budget, you can effectively reduce unwanted reflections and improve the sound quality of your room.
Free and affordable options include:
-
Acoustic panels
-
Acoustic foams
-
Pillows
-
Sofa
-
Window Curtains
-
Carpets and Rugs
Sound treatments aim not to eliminate sound altogether but to control the reflection of sound in a room. You can opt to cover the entire room or specific areas with acoustic panels or foam. Additionally, if you have sufficient space, you can place a sofa chair on top of a carpet to improve sound quality.
Apart from enhancing sound quality, these treatments also contribute to the aesthetic appeal of your studio, particularly if you are planning to produce video podcasts.
Part 3: Essential Podcast Accessories and Extras
You may be already familiar with some of the accessories listed here and want to expand your options. Every podcast studio requires this equipment to ensure that the shows run as smoothly as possible. Below is a list of the necessary podcast equipment.
Microphone Stand
It is possible to use a handheld mic, but if you want to record podcasts hands-free, a microphone stand can be very helpful.
Several types of stands are available, such as desk, tripod, boom, and low-profile stands. The best type of stand for you will depend on the type of microphone you have and your preferred seating position. Using a microphone stand can make you feel more comfortable while recording podcasts.
Desk Mic Stand
You can choose from three types of microphone stands: regular, low-profile, and desk-mounted. Regular desk mic stands are small and sit on top of a table. Desk mount mic stands are bigger and have an adjustable boom arm. They are equipped with a clamp that can be screwed in between the table to provide stability. A low-profile microphone stand is a smaller version of the desk mount.
Tripod Boom Stands
Tripod microphone stands are versatile tools commonly used in live performances and podcasts. Unlike desk microphone stands, tripod boom stands are designed to be placed on the floor for improved stability. The stands feature a telescoping boom arm that can be adjusted to change the arm's length, making it easy to position the microphone exactly where it's needed.
Desktop vs Tripod Mic Stand: Which One is Frequently Used?
Due to their popularity, desk mic stands are widely used in radio and podcast shows. The Lex Fridman Podcast, Joe Rogan Experience, and Bad Friends are examples of shows that use these stands. On the other hand, tripod mic stands are often used in podcast episodes without tables or desks.
Shock Mount
A shock mount, also known as an isolation mount, is a device used to attach a microphone to a stand and reduce vibrations. Microphones are sensitive to vibrations that can cause distracting noises during recordings.
To eliminate these noises, a shock mount is required. Shock mounts are usually made of plastic and are an affordable addition to your podcasting equipment.
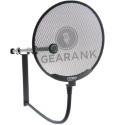
Pop Filters and Foam Covers
Pop filters are a valuable addition to your podcast equipment setup but are less well-known than other pieces of gear. They are widely used during the recording process to reduce popping sounds when speaking into a microphone. They also help to minimize harsh plosive sounds.
Some microphones come with a built-in pop filter, so you may not need to purchase a separate one, saving you money. The filter consists of a foam or mesh screen placed directly in front of the microphone.
It also serves as a protective barrier against saliva, which can corrode the microphone over time.
Storage Devices
Memory storage devices like external hard drives or USB drives can export and import your podcast content. This equipment is useful for moving audio files around.
Cable Management Solutions
Managing your cables may be fine if you plan to do a solo podcast or record with just one host. However, if you're planning to invite multiple guests, having a proper cable management system in place is important. With all the equipment required for podcasting,
it's easy to clutter up the studio and make the setup more difficult. Cable management accessories can help you organize things and prevent confusion when routing mics to the interface. This will keep your podcast studio tidy and less cluttered.
1. Boxes
This is where your equipment will be stored after they're used.
2. Microphone Clips
Microphone clips keep the XLR cable in place on the mic stand. It will prevent accidental trips or snags when adjusting the mic.
3. Loop Cable Wraps
This accessory is wrapped around the XLR cable when it's time to store them. It comes with a velcro that you could quickly unwrap when it's time for use. Some of them have white labels where you can write on top of them for easy identification.
Portable Podcasting Setup
If you need a portable podcast setup, you can use an audio interface with a condenser, dynamic microphone, or just a USB microphone as a portable digital recorder. In case you have multiple guests, purchasing an audio interface with at least 2-4 XLR audio inputs and outputs is recommended. For solo setups, a USB microphone is sufficient.
Final Thoughts
If you're planning to start a podcast, you'll need a few things to get started. The equipment required is the same whether you'll be recording alone or with others. You'll need a microphone, headphones, an audio interface, a computer, and a quiet room with good acoustic treatment.
None of the podcasts would be possible without recording and editing software. It's also important to consider adding accessories to keep your recording environment clean and organized.
Following this guide, you can obtain all the necessary podcast equipment to start recording.
If you're curious about other topics, you can check out our guide on how to record music to learn more about the ins and outs of recording. We also have a detailed review of the best condenser microphones on the market.
Frequently Asked Questions
Which One Is Better USB or XLR Microphones for Podcasts?
For ease of use and solo podcasting, a USB mic will give you all you need to start a podcast. They're plug-and-play and only require a little preparation to set up. On the other hand, XLR Mics is ideal when setting up multiple microphones for multiple guests.
Is It Expensive To Start A Podcast?
It could be expensive if you plan on setting up an advanced podcasting system. However, you can find plenty of cost-effective equipment in the market. For solo and beginner podcasters, USB microphones are available for as low as $90. For decent-quality closed-back headphones, you can get Audio-Technica ATH-M30x for $75.
You can also use acoustic foams to improve the acoustics of your room for around $37. If you have a Mac, you can use Garageband; if you have a PC, you can use Reaper, both of which are free audio editing software. For video editing, I recommend Da Vinci Resolve. Combining these items, you can set up your podcasting system for $202. That should cover what do you need for a podcast in terms of equipment.
Contributors:
- Raphael Pulgar - Editor / Co-writer
- Jerry Borillo - Illustrator