Recording Acoustic Guitar: The Right Way to do it. Read this.
Recording acoustic guitar can be challenging, especially if you're new to it.
Acoustic instruments are generally tricky to record due to fluctuating dynamics and setting levels. However, it gets easier once you know what you're doing.
You need to understand the requirements and factors to get the best acoustic recording possible.
Fortunately, this guide covers everything you need to know to achieve the best acoustic guitar recordings.
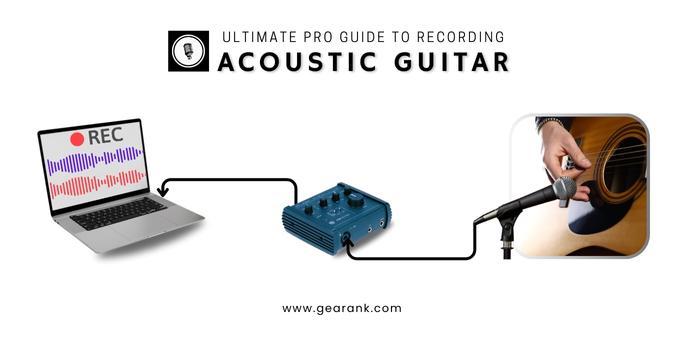
I will explain what you need for recording an acoustic guitar, the difference between acoustic and electroacoustic recording, how to choose the right mic, how to set up mic placement, and industry-standard tips for recording guitars. With this information, you can record your acoustic guitar like a pro.
How to Record Acoustic Guitar - What You Need
When recording acoustic guitars, you must understand precisely what you need. This includes recording equipment, an appropriate recording space, and music software for audio processing and mixing.
The good news is that you don't always require a professional recording studio or mastering engineer to achieve a great sound from your acoustic guitar. You only need the right equipment and the knowledge to use it effectively.
A basic recording guitar setup includes:
-
Microphone
-
Mic stand
-
XLR cable
-
Audio interface
-
Computer with recording software installed, such as a DAW
Using analog recording equipment is an alternative to an audio interface and DAW (digital audio workstation). To hear your recordings accurately, it is advisable to have high-quality studio headphones or studio monitors. This will significantly benefit you during the mixing and mastering process of the finished recording.
Another important factor is the room you're recording in, you'll get best results with acoustic foam and panels for reducing unwanted bounce and noise.
Recording Acoustic Guitar vs Electroacoustic Guitar
Choosing between an electroacoustic guitar and an acoustic guitar can be confusing when recording music. The sound produced by these two guitar types is different, and it may be challenging to achieve a natural sound. Additionally, electroacoustic guitars offer two other recording options.
Acoustic guitars cannot be recorded without a microphone since they lack a preamp or built-in pickups. On the other hand, electroacoustic guitars can be recorded by either plugging them directly into recording equipment with a jack lead or by traditionally using a microphone. It lets you record its direct sound, but it will be lacking the air and depth that you can get from mics.
For those who prioritize a clean and familiar sound, using a microphone to record an acoustic or electroacoustic guitar is preferred. Although it may not be the easiest method, it results in a fuller, warmer, and more natural-sounding recording with noticeable audio quality.
How to Record an Electroacoustic Guitar
Suppose you're not too concerned with sound quality and want to record your riffs and melodies for your personal use. In that case, there's nothing wrong with connecting your electroacoustic guitar to an audio interface for a hassle-free recording experience.
In this case, the sound amplified by the pickups will be used as the sound source. Although you can still use a microphone to record an electroacoustic guitar, a DI is more convenient and straightforward, especially for beginners. It's that simple, too – you only need an audio interface, jack lead, and some recording software.
Audio interfaces are designed to process audio signals correctly for computers and software. Connect your electroacoustic guitar and adjust the guitar volume and audio interface gain control (while playing) to achieve a dB level that's strong but won't clip at any part of the recording.
After that, it's just a matter of hitting the record button on your DAW or recording software and playing away.
The Best Acoustic Guitar Microphone
Knowing the basics of how to record music helps, but there are important distinctions when capturing acoustic guitars.
If you want to record acoustic guitars with a single mic using the traditional method, the first step is to choose the best acoustic instrument mic. Using the wrong type of microphone can negatively affect the sound quality of your acoustic guitar.
Acoustic guitars produce warm and bright sounds and can have a wide range of dynamics throughout most songs, which makes them difficult to record. However, due to their extensive frequency range and dynamic range, the best mic models to go for are condenser microphones with a cardioid polar pattern.
Condenser cardioid mics are always the best choice for brighter, more delicate sounds. While a dynamic mic is better for live vocal mic use and other instruments with less dynamic range, a condenser mic is what you need to capture finer details. If you also want to capture room sound along with your acoustic, a condenser microphone is a great choice.
Moreover, condenser microphones are the best choice if you are recording a singing guitarist. They help capture a bright-sounding vocal recording, especially if the song is soft or mellow. In this case, directional mics will be best to avoid sound "spillage" between mics.
Due to their more intricate, fragile design, condenser mics are generally more expensive than dynamic microphones. These mics also require phantom power to work, so you'll need to ensure that your recording device has a phantom power supply built-in. If you are working on a budget, you can also opt for a condenser USB mic, which eliminates the need for XLR cables and external power, making it easier to use.
How to Mic an Acoustic Guitar
Getting a good sound when recording an acoustic guitar requires precise microphone placement. The sound produced by the body of the guitar can differ depending on where and how the mic picks it up. So, where exactly should you place your microphone to get the best sound?
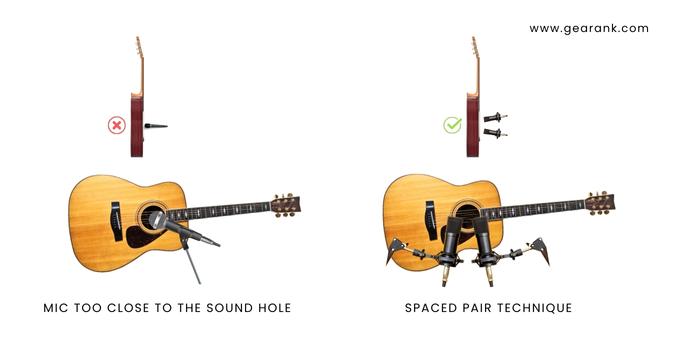
If you have only one mic, the general rule of thumb is to place the mic at the sound hole for the most balanced sound. This is because the sound hole is the primary source of the guitar's acoustic sound. However, if you place the mic too close to the sound hole, you may end up with a thinner sound that lacks bass response or has too much fret noise. So just move the mic slightly and test until you find a good balanced sound. Fret sounds might not be noticeable while playing, but they can stick out on some recordings.
To avoid these problems, it's recommended to use the spaced pair technique which involves using two mics for recording acoustic guitar. With a second mic on the same instrument, you have more flexibility when mixing and mastering the recording. Stereo miking lets you capture a wider stereo image and have two separate tracks if one recording doesn't turn out well.
Using two condenser mics on separate mic stands gives you room for error and more flexibility when mixing and mastering the recording. You can point both mics towards the guitar sound hole from opposite angles or use spaced pairs at different sides of the guitar body for a well-rounded and balanced sound. By placing one mic closer to the sound hole and the other closer to the neck or bridge, you can capture the full tonal range of the guitar. Additionally, you can experiment with different mic types like ribbon mics, and different microphone polar patterns like an omnidirectional mic to find the best acoustic guitar sound for your recording.
Conclusion
Recording acoustic guitar has its methods and techniques. However, it still requires trial and error because other factors come into play during the recording process. Therefore, it's worth knowing what these factors are.
For final acoustic guitar recording tips, always change your strings before recording. Dull strings produce a poor sound. To block external sounds from being recorded, install some acoustic panels or foam to soundproof the room and improve acoustics.
To get the best recording level for your guitar track, always set levels to a strong signal that isn't clipping at any part of the recording. Be aware of aggressive rhythm parts or loud chorus strumming. You'll thank yourself later on during the music production and mixing process.
This is the last stage, where you can improve your recording by adding processing effects such as EQ for improved tonality, compression for consistent dynamics throughout the track, and reverb for a sense of space and depth.
Contributors:
- Jerry Borillo - Illustrator