

How to String a Classical Guitar Like a Pro - Read this

Regardless of the type of guitar you have, you will eventually have to replace the strings.
So if you own a classical guitar, or a nylon string guitar, you have to know how to string a classical guitar.
You must Change The Strings of a classical guitar every few months, just like any other guitar.
Here, I'll walk you through the entire processes of restringing. I've divided the process into steps that are easy to follow, even for absolute first timers.
What is a classical Guitar?
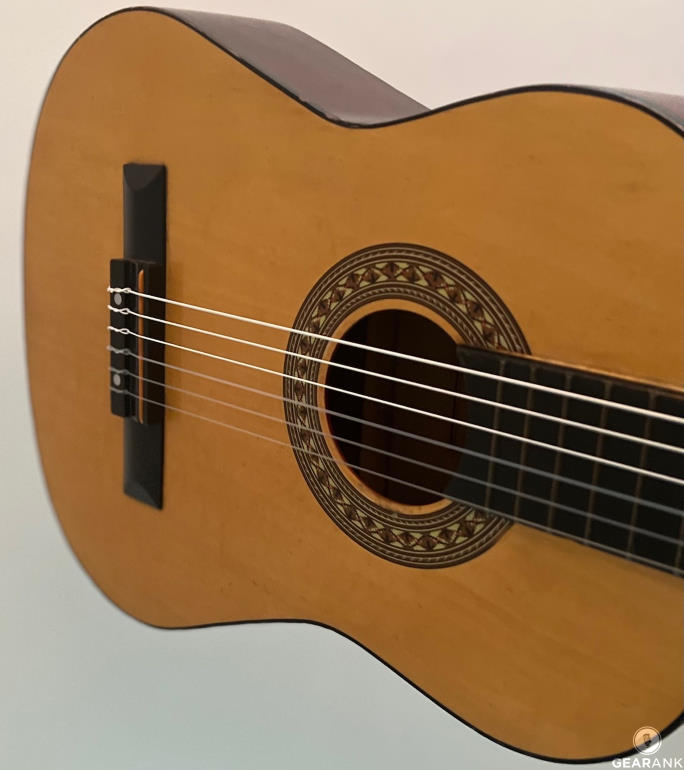
First lets tackle this basic question. The classical guitar is a traditional acoustic guitar equipped with nylon strings.
And as the name implies, it is the go-to acoustic guitar for professionals and students of classical era music.
It is also called a nylon string acoustic guitar based on the type of strings it has. It is part of the group of nylon string guitars which include flamenco, and other Spanish guitar styles.
The classical guitar design has been around for ages, but it's not just limited to classical music. You'll hear classical guitars in ballads, pop songs, folk, Latin, flamenco, and other styles of music.
The nylon strings have a different feel and sound. They produce a thick and mellow sound than the more common steel acoustic guitar strings.
There are similarities to steel string acoustic guitars, but the difference in feel and sound are substantial.
Which Strings Should I Use? Steel Strings vs Nylon Strings
Regarding string changes, your options are limited to the type of guitar you have.
You either have a steel string guitar or a nylon string guitar - you should use the appropriate string set.
It is possible to swap the strings of steel string guitars with nylon string guitars, but the result will not be optimal.
Steel strings may not fit the grooves on a classical guitar's nut or align with the bridge correctly. And the same can be said when you try to fit nylon strings onto a steel string acoustic. The method of changing acoustic guitar strings is also slightly different.
Using incorrect string types can also put excessive pressure on the neck, which can cause bending or breaking. This is the main reason why swapping strings around is a no-no, even if it "appears" to be fine.
Some beginners mistake the bass side strings for steel strings because they are wrapped in silver (or other metal) windings. But each wound string has a nylon core that gives them a distinct sound and feel. The bass nylon strings complement the plain nylon strings (thin treble strings).
Some of the most popular nylon strings for classical guitars are the D'Addario EJ43 Pro-Arte Nylon Classical Guitar Strings, the Ernie Ball Earthwood Folk Nylon Guitar Strings, and the Savarez Alliance HT Classic High Tension.
Note that nylon strings are more prone to stretching than steel strings. So tuning can be finicky when the strings are still fresh and have not been broken in yet.
Supplies Needed: How to String a Classical Guitar?
- A new set of nylon classical guitar strings
- A tuner
- String winder (optional)
- String cutter / wire cutter
How To Change Classical Guitar Strings
You need to change the strings of a guitar regularly to get good tone and playability. This is particularly true for classical guitars with nylon strings that stretch over time.
When strings get older, they are harder to keep in tune and will also have a duller sound.
This step-by-step guide will show you how to string a guitar, starting with just one guitar string.
Note that you can replace just one string if circumstances don't allow a full restring. But it is best to replace all strings with a fresh set for even response and tone across all strings.
Step One: Loosen The String Tension
For step 1, let's start with the sixth string on your guitar. This is the low e string.
Turn the appropriate machine head or tuning peg to loosen the string tension.
The tuners are located on the headstock.
Do the same thing with the other strings, slackening each until you reach the high E-string.
You can turn the tuning peg by hand, as if you were tuning the guitar, or use a string winder to speed up the process.
You can either remove one string at a time or slacken all the strings simultaneously and take them all off.
Step Two: Detach or Cut The Strings
Once the strings are slack enough, untying and pulling them off the tuners and the bridge will be easier.
Be aware that even on nylon strings, string ends can be sharp. If you're not careful, these ends can damage your guitar's finish or, worse, wound your hands.
You can also use wire cutters or string cutters to snip the strings. This'll make it easier and faster for the strings to come out of the tuners and bridge. Nail clippers can also be used, but they aren't as efficient.
Be sure that the strings are slack before snipping, as they, as a tightly wound string, could spring off and hurt you.
I recommend snipping between the sound hole and the bridge.
After cutting, gently remove the string from the barrel of the guitar.
Step Three: Untie The Strings From The Bridge
Now, you can untie each string at the bridge and the tuners.
You have to untie the knot at the bridge and push the string through to the hole to get it out.
There is no tie on the tuners, so it's just a matter of pushing each one off the tuner hole.
The wound bass strings are thicker, so they are sometimes harder to pull from the tuning pegs and the bridge. Be patient when pushing them off the slots.
Once removed, remember to dispose of the old strings properly. A cut string lying around can be dangerous to people and pets. They can also damage other objects.
Step Four: Adding The Bass Strings to the Bridge
It is best to add one string at a time, tighten the tension by a bit, then return to add the other strings.
With a pack of new strings, grab the thickest (6th string), and put the end of the string in the corresponding hole.
Push it into the hole in the bridge so that about 5 inches are sticking out of the end of your guitar.
Then, loop the 6th string around once so it goes under the other half of the string in the same direction to tie a knot. Place the end of the string under the loop and pull it to tighten.
With a classical guitar, there are no bridge pegs to keep the string in place, so ensure your knot is tight.
Hold the string tight, and pull the string up to the tuning peg. If it is not secure enough, tighten the knot by pulling on both sides of the string- from the longest part to the bit sticking out at the bridge.
Follow the same process for the 5th and 4th strings (A and D) as the G, B, and high E strings may need to be done more tightly.
Note that some string manufacturers offer nylon strings with ball ends. These are easier to mount on to the bridge, no need to tie them around the bridge.
Step Five: Adding The Third, Second, And First String
The 3rd, 2nd, and 1st strings are thinner than the others and get skinnier as you get closer to the first string. This makes it easier for them to slip out when you are tying them at the bridge.
So, follow the same process, but this time- push the string through the hole, and put it under the loop a few more times to keep it in place.
For the thinnest string, you may have to do a double loop or even a third loop before you tie your knot.
Ensure the right strings are going in the appropriate hole. An excellent way to remember is that the lowest string is the thickest, and they get thinner as you reach the highest string.
It can be tricky to tie classical guitar strings to the bridge due to the lack of bridge pins, so be sure to do it as tight as possible to avoid them pinging out when attaching to the neck.
Step Six: Attaching Strings To The Correct Tuning Post
Once all the strings are tied to the bridge, turn the tuning peg for the 6th string until you see the hole facing upwards.
Push the string end (not attached to the bridge) through the hole once, and run it back under the gap under the capstan (where the string will wrap around).
Pull the string past it until you have about 4-5 inches of slack at the neck. This gives you room to tune the guitar. Check if the bridge knot is secure, and loop the string above the capstan. Then, tighten the string with the tuning peg.
Follow the same procedure with all the strings. Ensure the strings align to their appropriate slots on the bridge and headstock.
Step Seven: Tuning & Trimming String Tails
Once properly set, turn the tuning peg to tighten each classical guitar string. Wind the string until you feel them tighten.
This can be a long and tiring process, so I recommend using a string winder. This cheap tool lets you spin the tuners faster and with less effort for quicker tuning.
Be wary of over-tightening the strings, as high-tension strings are prone to snapping.
Once each new string is tuned, you'll need to deal with excess string. You can snip each protruding tail of the string with wire cutters.
Repeat for each classical guitar string until you have completed tuning all strings. Then, you're ready to start playing!
Summary
Now you're equipped with the know-how for changing classical strings. And the more you do it, the easier the entire string-changing process becomes.
With a fresh set installed, your guitar will be in the correct pitch and feel more responsive.
When you feel lost while restringing your guitar, go back through each of our steps
More Guitar Gear


 Guitar Neck Shapes
Guitar Neck Shapes


