How To String Acoustic Guitar - The Right Way

As a guitar teacher, I often get asked how to string an acoustic guitar.
After years of restringing and teaching students, let me cut to the chase and show you my exact proven method, step by step.
Make sure to follow the steps in sequence and you won’t go wrong.
How To String an Acoustic Guitar
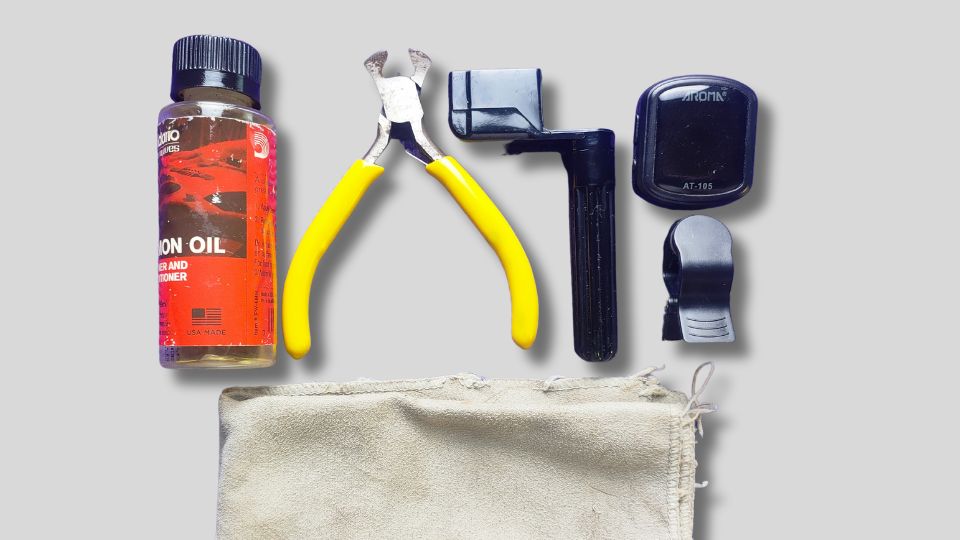
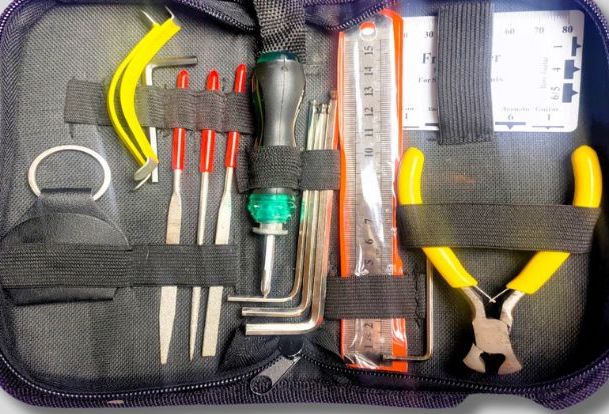
Step 1: Prepare The Tools
-
Guitar String Winder
-
New Strings
-
Guitar Cleaner or Conditioner
-
Neck Stand or A few books
-
Tuner or Tuner App
-
Wire Cutters/String Cutter or Pliers
Step 2: Setup Your Workstation
Get a flat table. Put a towel or a rubber mat on top to protect your guitar from scratches.
Also, put your tools on top of or close to your workstation. This will make them easier to reach.

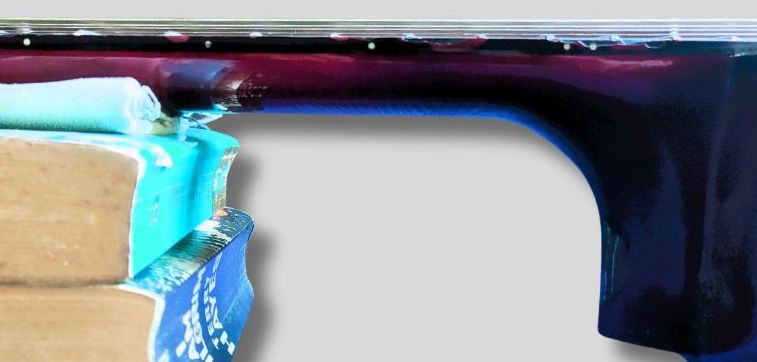
Step 3: Level The Guitar Neck
Place a guitar neck stand or a stack of books under your guitar’s neck.
The guitar body should be the same level as the neck because putting tension on the neck can damage your guitar.
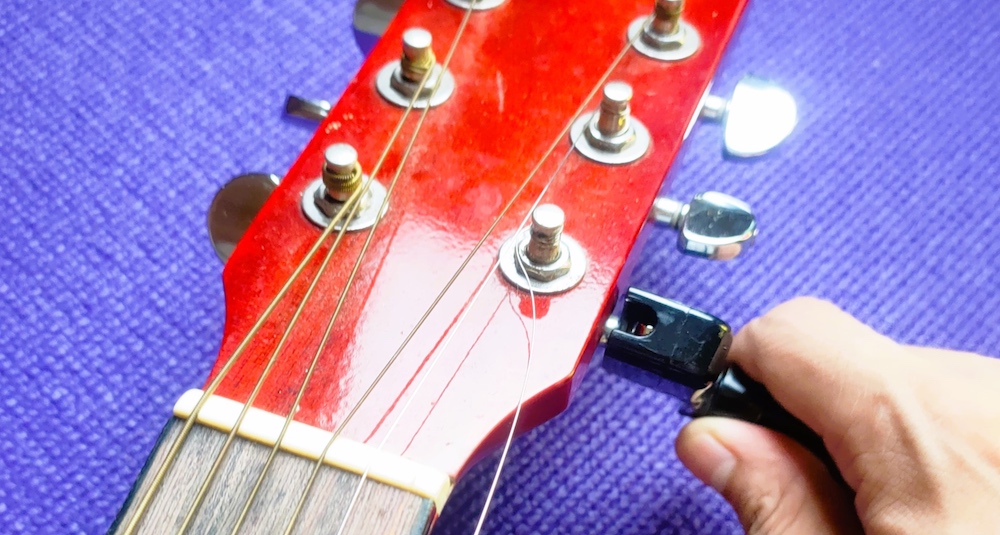
Step 4: Loosen Your Guitar Strings
Unwind your guitar strings one at a time until all are loose.
You can use a string winder, if you have one, to make the work faster.
All you have to do is attach it to the tuning pegs and turn it. It allows for faster tuning and reduces the stress to your wrist.
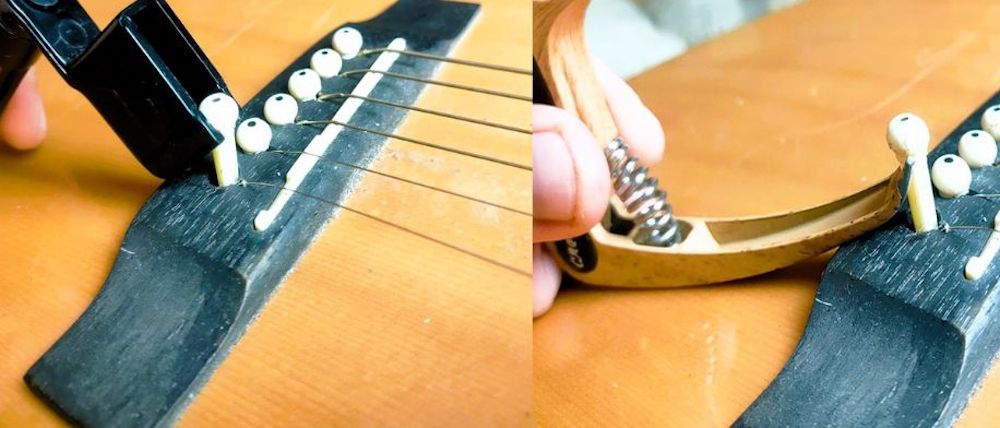
Step 5: Removing All The Strings
Pop out the bridge pins using needle-nose pliers or a specific bridge pin puller.
Most String winders can also be used as bridge pin pullers. They have grooves that fit perfectly with regular bridge string pins. And this allows you to pull bridge pins quickly and more efficiently, with minimal risk of damaging your guitar.
Gently pull out the old strings after you remove all the bridge pins.
Step 6: Install Your New Acoustic Guitar Strings
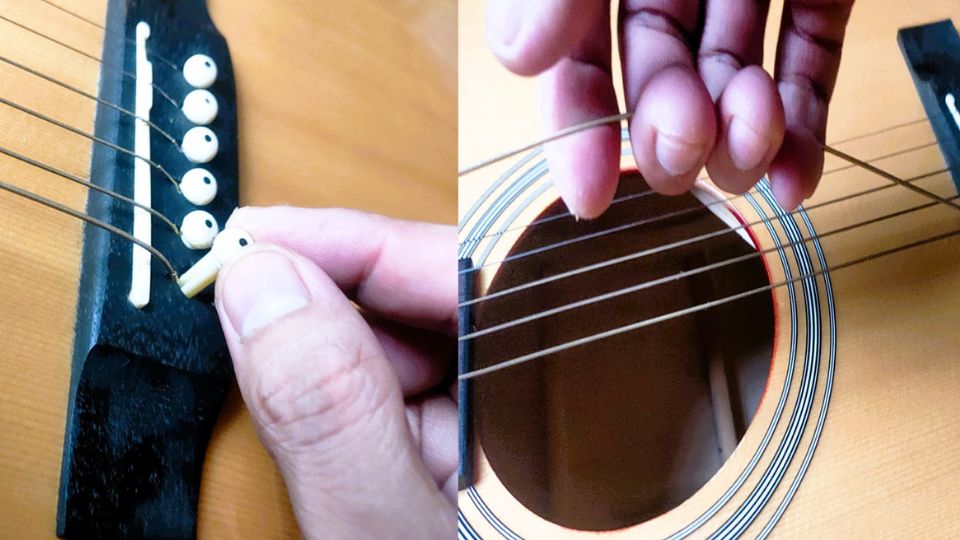
Insert the string ball end through the bridge hole, then reinsert the bridge pin.
Once you’ve placed the bridge pins, pull the strings.
Do it until the ball end is locked and tightly secured.
Note that there are bridges that follow the design of classical guitars. Instead of going vertically into the body, the strings go through the bridge plate horizontally via holes on the side. The string ball end then holds the string in place.
Step 7: Wind Up the New Strings and Trim Excess String
Rotate each tuning peg to tighten the steel strings just enough so they don't slack.
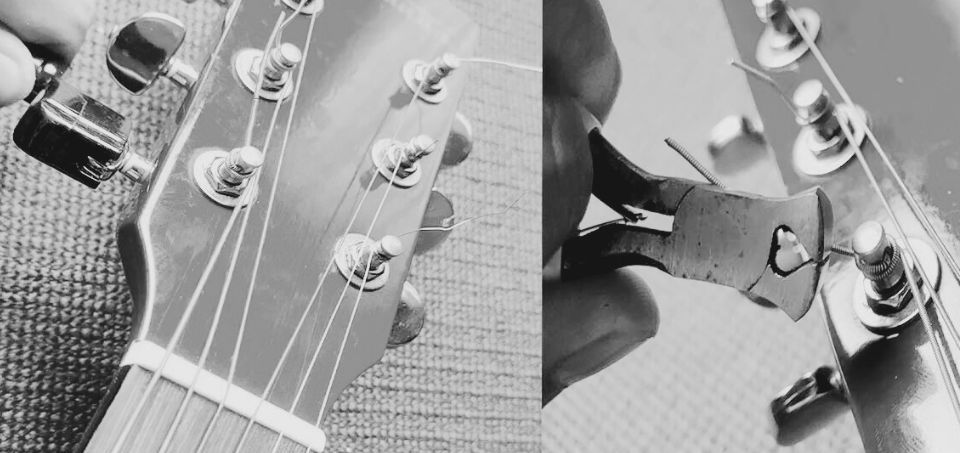
Trim the excess string with wire cutters or pliers at the end of each string post.
Cutting excess steel strings gives it a tidy look and reduces the risk of getting cut.
Step 8: Tuning
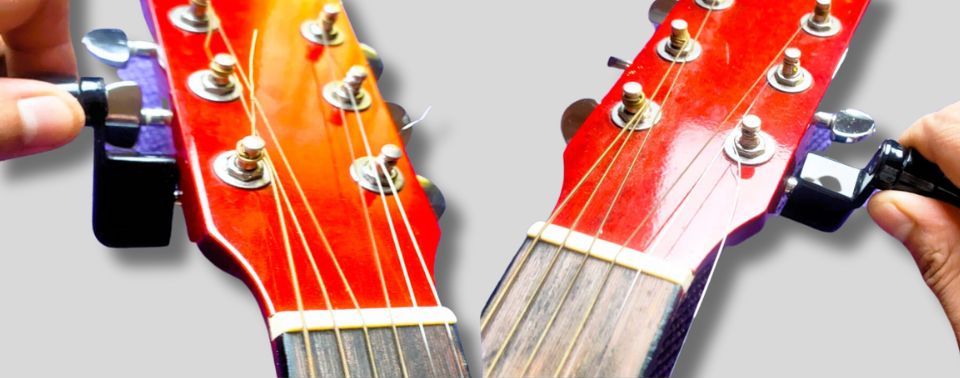
Start winding the strings from the thickest string down to the thinnest string.
Tune each string in small increments and ensure the tension is evenly distributed.
(This ensures that the thinner strings won't snap accidentally.)
Once you’ve tuned all the strings to standard guitar tuning, give it a good pull, then tune it again. For less tension, you can go for half-step down tuning.
(Newly installed strings tend to go out of tune because they are still adjusting to the tension. Pulling the strings helps set them in place. This will reduce the chance of the strings going out of tune easily. Plus, it also helps lock the string's ball end in place.)

Tips
-
Clean your instrument as you change guitar strings. Remove trash inside the sound hole and wipe it with a cloth.

-
Part of owning a guitar is regular restringing. So having a set of tools is very important.
-
While tightening a string, ensure that each wrap sits properly next to the one before it, with no overlap.
-
Maintain tension on the strings by holding the string slightly taut with one hand while turning the tuning key with the other. This eliminates slack and overlap.
-
You should aim for 2-3 windings around the tuning post for most strings. This ensures a secure grip with minimal overlap. Tune the instrument to pitch after winding all of the strings. Then, stretch each string gently to help it settle and keep its pitch.
-
Trim any excess strings. They can cause cuts and scratches - on you, the headstock, and the guitar case.
-
If you don't have a bridge in puller, use thin and hard items to pop out your bridge pins.
Make sure to place a soft cloth underneath to prevent direct contact and damage.
Frequently Asked Questions
Can I Damage My Acoustic Guitar When Changing Strings?
This is a question that stops many beginners, including some experienced musicians, from changing strings on their own.
The good news is that acoustic guitars have stable and solid bodies. There are less moving parts that can be impacted by string changes. So there's less worry while you do the work.
At times, some parts might come loose like the saddle and nut. but acoustic guitars are still easier to maintain all in all.
The main danger really comes from the tips of the strings, as they can scratch the surface of your acoustic. Thankfully, this is easily avoidable by mindful handling of the end of the string as you go through the steps.
Another possible cause of damage is switching your strings to a thicker gauge. The added tension can cause excessive stress on the neck and bridge. This may result in deformation that impacts string action and the overall playability of your guitar.
The safest course of action is to go for the default gauge that your guitar ships with. But if you really want to switch to thicker strings, it is best to consult with the manufacturer or a local luthier.
Note that the process for changing electric guitar strings is slightly different because of the various bridge, saddle, nuts, and other hardware that they use.
How Often Should You Restring An Acoustic Guitar?
It depends. The tone of your guitar depends on the strings. So, if you want your guitar to sound great, you can change acoustic guitar strings as often as you want.
On the other hand, if you’re not very particular with your tone, you can afford not to change strings for a longer period (given that it’s not all rusty).
And speaking of rust, if you have acid reflux, chances are you have acidic sweat. (THIS IS NOT HEALTH ADVICE; CHECK WITH YOUR DOCTOR TO MAKE SURE.) Acidic sweat is corrosive, so you must change your strings more often.
To avoid this, you can use coated strings. It’s coated with polymer, which is best to prevent corrosion. Brands like Elixir and D’Addario strings are popular choices for this.
Cleaning your hands and instruments before and after use would also help.

Is It Okay To Remove Strings All At Once?
Yes, it's okay to remove strings all at once. Just make sure that the guitar is in good condition.
Watch out for the saddle and nut, as some tend to fall off.
What Are Wound Strings? Why Are There Fewer Wound Strings In An Electric Guitar, Compared To an Acoustic Guitar?
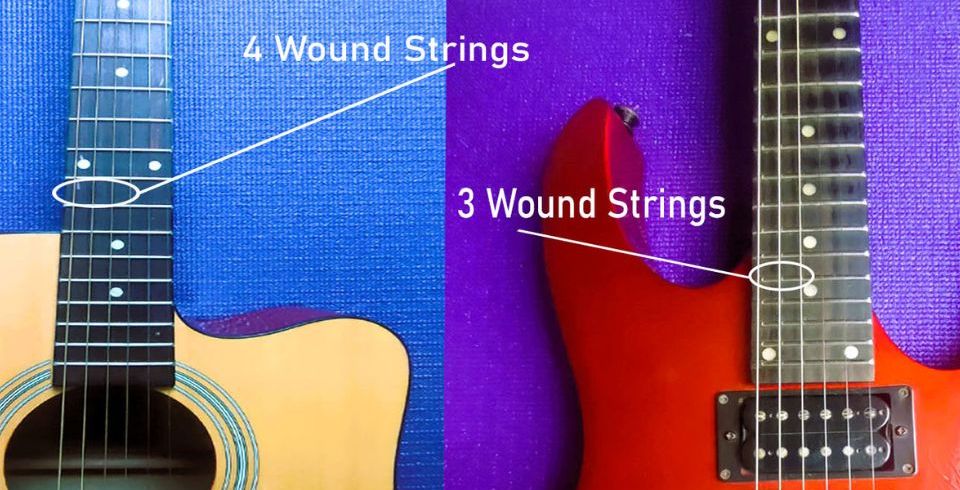
A wound string is simply a string that has another string wrapped or wound around it. Hence, the name. The general string configuration has 3 bass strings with windings, and three plain treble strings. Most acoustic guitars follow a 4 is to 2 ratio (4 wound strings and 2 plain strings). This makes the G string sound fuller, but also makes it stiffer and harder to bend.
So why does electric guitars have fewer wound strings than acoustic guitars? The reason is simple: playability.
Less tension applied to the guitar neck means easier playability.
Electric guitars are intended to play leads and fast-paced pieces. So, softer string tension will make techniques such as bending, vibrato, tapping, and others much easier. Techniques that would otherwise be difficult to perform if the string tension is high, like acoustic guitars.
Final Thoughts

Now you know how to string an acoustic guitar.
You no longer need a friend to do it for you, and you'll be able to do it faster as you gain more experience.
Your guitar sounds better with fresh strings, and it will inspire you to play more and be creative.
So go give it a try. Good luck!
Contributors:
Jerome Arcon - Co-writer