Guitar Micing 101: Step By Step
Guitar MicingGuitar micing refers to capturing the guitar's unique sound via microphones. This process of capturing guitar sound can substantially impact the resulting sound for better or worse. |
These days, recording acoustic guitars can be done by plugging directly into an audio interface. However, there's no replacing proper guitar micing when capturing the natural sound and authentic tone of an acoustic guitar. The same can be said with guitar amps. A properly placed mic can get you great electric guitar tones.
Properly mic'ed acoustic guitars and guitar amps allow the instrument's unique sound to shine through. As a result, you get a balanced sound and a more professional-sounding record.
In this article, I will guide you through the steps to properly mic an acoustic guitar and offer some tips on guitar amp micing as well.
By the end of this article, you will know how to mic your acoustic guitar correctly and mic placements in relation to a guitar amp speaker.
What is Guitar Micing?
Guitar micing refers to the process of capturing the sound of a guitar. For acoustic guitar, this means setting up mic(s) to capture the acoustic guitar's sound. For electric guitars, this means micing up the guitar amp speakers.
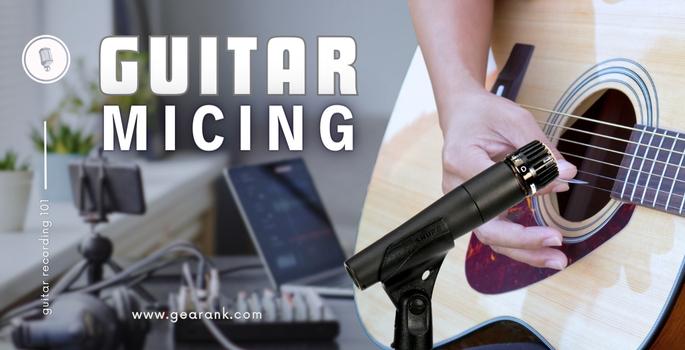
When micing acoustic guitars, sound engineers usually place a microphone within close proximity of the guitar's sound hole. The aim is to capture all or most of the guitar's unique sound. This includes nuances and resonance of the body.
Micing a guitar amp requires placing mics near the center of the speaker, and moving it slightly to get the preferred tone and response.
Different types of microphones will pick up sounds differently. Equally important is the microphone placement. This is because it has the most significant impact on the quality of sound captured.
Steps on How to Mic Your Acoustic Guitars
Step 1: Consider Your Location
In acoustic guitar recording, consider the shape of the room you are in because it will affect the sound of your recording. For example, choosing a room with hard surfaces will result in sound wave reflections or echoes, which can be detrimental to the overall sound.
The more soft furniture and surfaces in the room, the more sound will be absorbed. Try different locations around your home to find a good spot for recording.
Step 2: The Right Mic Choice
-
If you're looking for a guitar tone with more mid-range, consider using a dynamic microphone. You can choose between the Shure SM57 (this same mic is arguably the best mic for a guitar amp) or the Sennheiser MD 421. These microphones are perfect for aggressive rhythm parts and will help your guitar stand out in the mix.
-
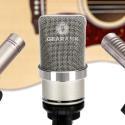
Use condenser microphones for a slightly brighter sound that's still warm compared to a dynamic mic. Models like the Neumann U87, U67, or Blue Baby Bottle SL are large diaphragm condenser mic examples. These mics provide a rich, thick acoustic guitar sound, great for thickening a solo instrument line.
-
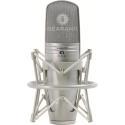
Other condenser microphone models are the Shure SM81 or the RODE NT5, which are small diaphragm condenser mics. A small diaphragm condenser mic is goof at capturing nuances, which adds to the immediacy and realism of the captured acoustic guitar sound.
-
Generally speaking, condenser microphones are great for capturing the sound of bright amps like a Fender. A condenser microphone can also capture the room sound, or the ambiance of the room. However, in a less-treated room, they may suffer, so do consider going the DIY acoustic panels route if needed.
-
Lastly, ribbon microphones like the Royer R-121 or Beyer M 160 capture balanced lows and highs but are best for capturing the lows. They also have an accurate response and more presence while keeping ambient noise to a minimum.
Cardioid: A cardioid mic pattern is among the most sensitive directional mics. It readily captures sound up front and less sensitive on the sides and back. A cardioid pickup pattern mic is ideal for rejecting unwanted sound and feedback. And this noise rejection is why these mic types sound good.
Omnidirectional: An omnidirectional microphone is sensitive to sounds from all directions. It's best for recording acoustic instruments. However, it's more susceptible to feedback and room ambiance in a live setting.
Figure 8: A Figure 8 microphone picks up sound from the front and back while rejecting sounds from the sides. This is great for capturing the sound of an amp and the room's ambiance.
Step 3: Mic Recording Techniques
The Sweet Spot: How you record acoustic guitar has much to do with mic technique or mic placement.
You should distance your mic from the guitar by at least 6 inches. This way, you still have that separation, plus the mic can record how your guitar interacts with the room.
Placing the mic too close to the sound hole will highlight the lower frequencies, creating a boomy sound. Too much of this boomy sound will reduce the dynamics of your guitar sound.
Similarly, placing the mic too close to your instrument will create a proximity effect. Wherein it amplifies the bass frequencies.
-
Mic Positioning: Place your mic 6–12 inches away from the 12th fret to the14th fret. This location often produces the most natural and balanced sound.
Point the mic towards the guitar neck if you want a thinner sound. If you want to hear the pick attack or the fingers while playing, point the mic more toward the sound hole.
For a more mid- and bass-rich sound, you should record closer to the guitar's body. This complements nicely with a vocal track with emphasis on higher frequency response.
-
Setup your Guitar: When setting up to record your acoustic guitar, it's important to get the tone you want right at the get-go. Because it can be difficult to edit it later. Listen to how it sounds in your recording environment.
Ensuring your guitar is in tune before recording is also important as an acoustic guitarist. Some acoustic guitars have an EQ setting that you can use to shape your guitar tone.
-
Mono or Stereo Mic Technique: There are trade-offs regarding mono or stereo mics recording. Using only one mic for a mono effect is easier to set up.
Having a single microphone means you only have one sound source. This helps avoid phasing issues but can produce a thinner sound.
You can use two guitar mics for a thicker sound or stereo miking. This will give you a richer sound with more depth in your recorded tracks.
However, this stereo technique with two sound sources will make your recording susceptible to phasing. You have to ensure that your two mics are in phase with each other.
There are two main techniques for stereo recording: spaced mics (pair (A/B) and coincident pair (X/Y).
Spaced Pair (A/B) - With Spaced Pair, you position the second mic away from your primary mic. And the two mics should be three times their distance from the guitar.
This allows you to capture a broader stereo image. In the mixing process, you'll often have to pan these two signals extremely far away.
Coincident Pair (X/Y) - With Coincident Pair, you place the two mics as close to each other as possible at a 90° mic angle. This allows you to capture a very detailed stereo image. In mixing, you'll have to pan these two signals extremely far away.
-
Use a DAW - If you still experience phasing issues after these methods, the most accurate way to solve them is by using a DAW.
Record audio to Pro Tools or any DAW using your stereo pair. Zoom in on the sound wave to see if both waves are in phase. Use time delay or phase inversion to align the mic signal waves to be in phase. -
Your Preference: Finally, once you've set everything in place and recorded your guitar, it's important to listen. Using the abovementioned techniques, experiment with different mic placements. Do this until you achieve the sound or aesthetic you're looking for.
Why is Proper Micing Important in Recording Acoustic Guitar?
Placing the microphone in a specific mic position can significantly affect the tone of your acoustic guitar. This gives you more creative control, as you can shape the guitar sound with different mic placements.
Technology has advanced, with digital audio workstations (DAWs). These apps allow for adding effects using plugins. These effects can mimic virtually every effect in existence. They can even simulate mic placements.
Despite that, they still cannot fully replicate the realistic sound of a miked acoustic guitar. This is why most producers still prefer this method of recording acoustic guitar sounds.
There's just something about the raw sound of an acoustic guitar that plugins cannot match. Therefore, it's important to pay attention to proper microphone placement.
Depending on the microphone position, you can achieve different guitar tones, such as more treble, warmth, or a richer tone.
This same prince applies to micing guitar cabs.
Proper Micing of Guitar Amp Speakers
There are now plenty of speaker cabinet emulations available, which are easier to use. But many pros still prefer the analog tone and harmonic distortion that a miked amp provides.
The tried and tested method of miking guitar cabinets is by placing a dynamic microphone straight to the speaker center, such as the Shure SM57. It doesn't have to be pointed at the exact center, but rather close to the center of the speaker cone. The closer the mic is to the center, the brighter and more focused the sound is. Moving the mic away from the center towards the edge results in a warmer tone.
Like with acoustic guitar micing, you can use more than one mic for a fuller sound. You can combine the dynamic mic with a condenser mic for a more nuances and textured representation of the amp's output.
Pay attention to the distance from the speaker – closer placement emphasizes the speaker's direct sound while moving it farther captures more room ambience. Lastly, experimenting with phase alignment and checking the polarity of multiple mics can help avoid phase cancellation issues, contributing to a well-balanced and impactful guitar tone in the final recording.
Final Thoughts
Guitar micing is an art that can significantly enhance your guitar recording. By using different mics and changing their positions, you can get a more accurate picture of your guitar tone, and shape the sound to your preference.
The best mic for recording acoustic guitar and microphone placement are the two crucial factors. They can impact the frequency range captured during recording.
You can achieve the perfect sound you're looking for by pairing the right microphone with the perfect position, be it for recording acoustic guitar or capturing the good sound of a quality guitar speaker cabinet.
Frequently Asked Questions
How Can I Prevent Phasing Issues?
Phasing issues arise from having two microphones. To avoid this, record audio using both your mics simultaneously. Notice the sound waves in the DAW. Check if they're lined up. If not, use phase inversion or timing alignment to get the sound waves aligned.
How Can I Avoid Feedback?
Move your mic away from the monitor or speaker, especially if you're a singing guitarist who have both your vocals and guitar miked up. You can also use a microphone that rejects ambient sound, like a dynamic microphone.
Can I Enhance Tone After Recording a Mic'ed Guitar?
There are plenty of options; you can use EQ and compression or apply more effects to the sound as needed. But the core sound of the guitar would still be there, hence the importance of getting the tone right during recording.
Contributors:
Jerome Arcon - Co-Writer
Raphael Pulgar - Editing
Jerry Borillo - Illustrator