Guitar Pedal Order: What is The Correct Sequence?
What is the best guitar pedal order?
If you're getting started with pedals and want the individual stompboxes over a multi-effects pedal, this question will be towards the top of your list.
There are different opinions over what the best guitar pedal order is. But, when chaining your guitar pedals, there are no hard and fast rules that guitar players follow.
So, if you need some clarity on "signal chain" (The route that your audio signal takes from its origin to its destination.) we've got you covered!
Here, we have pulled together a guide for what I believe is the best guitar pedal order to get you started.
By the end, you'll be able to assemble the best pedalboard to suit your style. We've also included some honorable mentions of pedals to spark your interest. Pedals that you can include on your pedal board, but not necessary.
1. Tuner Pedal
Start your signal chain with a tuner pedal for the most accurate tuning.
Placing it after other effects, especially your drive or delay pedals, can distort sounds and hamper accuracy.
For guitar players, having tuner pedals is very important. Guitars (electric guitar in particular) are prone to going out of tune at times. So, it's a must to have one available.
Also, pedal tuners are more accurate than their clip-on sibling. And, unlike clip-on tuners, pedal tuners have a muting function which is more useful when playing live.
2. Wah Pedal
Placing the wah pedals towards the beginning of the chain means that you are only altering the original sound. This way, you don't lose the natural wah effect due to distortion.
Wah pedals create a very distinctive sound. It allows the peak frequency to move up and down, producing that iconic 'wah' sound.
This pedal is responsible for a lot of iconic songs. Songs like: Voodoo Child by Jimmy Hendrix; Enter Sandman by Metallica; and many others.
3. Dynamic Effects Pedal
These types of pedals affect the volume and tone of your signal. Often placed early in the signal chain.
-
Compressor - Compressors help keep your tone consistent. As it evens out the tone you're feeding to the rest of the pedals, it also helps give more sustain to your tone.
Placing it near the beginning of your chain ensures that the signal remains dynamic.
Meaning, you are sending a neat, clean signal to the rest of the pedals. (especially before any gain)
Making each note ring out longer and clearer. Giving a more polished and tight effect on your playing.
A compressor can also serve as a clean boost, which you can use for your leads.
Alternatively, by placing the compressor at the end of the chain, you will end up compressing your whole sound, including your effects. Which may result in a loss of dynamics in your tone.
-
Boost Pedal - Boost pedals literally 'boost' the signal level without changing your guitar's tone or frequency range. It does the work of a power amp, and when this goes straight into overdrive or distortion pedals, it can cause more overdrive and clipping.
This results in a louder, grittier, and thicker sound with your guitar.
Placing this earlier in the chain will saturate the signal. Just like the way SRV uses Tube Screamer in his setup.
Meanwhile, putting this after other gain pedals can make your sound louder.
-
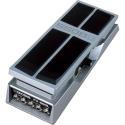
Volume Pedal - As for volume pedal placement, it should always go after your gain pedals. But, the volume pedal must be placed before any modulation or time-based effects.
This allows you to keep your signal's drive and retain the long trails needed for your reverb and delay.
But, some would use volume pedals at the beginning or the end of their effects chain.
The role of a volume pedal is pretty obvious—they control the volume of your guitar! This makes a volume pedal a dynamic pedal.
They act as a master volume control. So, you don't need to make volume adjustments through the amplifier or your guitar's volume knob.
-
EQ Pedal - To alter the tone of the guitar rather than the output of the next pedal, such as a dirt pedal or compressor, put in the EQ pedal before those effects.
You can use EQ pedals to cut (lower) or boost (raise) the frequencies of your guitar tone.
4. Pitch Effects Pedal
Often positioned near the beginning of your signal chain (usually after tuners and dynamic pedals). Along with a clean signal feeding into them. Ensuring the clearest input signal, allowing the note to be traced more easily.
-
Octaver - To pitch up or down, Octave pedals must get the cleanest signal possible from a guitar. That is why it is best placed close to the start of the chain.
An octave pedal adds an octave beneath or above a note that is being played. This duplicating note can be supported or overpowered by a clean signal that is balanced in volume." Some octave pedals produce a tone that is one or two octaves lower than the original note, while others add a tone that is one octave higher.
-
Pitch Shifter - Placing this at the beginning after a compressor will ensure it receives a consistent signal. This will help improve tracking.
Pitch shifters change pitch by cents, semitones, and octaves. Unlike an octaver, which only increases or decreases pitch by octaves. A pitch shifter pedal also allows you to achieve a harmonizing effect without the need for another guitar player. Ideal for experimentalists, this effect can help you form some truly creative ideas and sounds.
-
Harmonizer - The harmonizer should be positioned near the start of your chain, especially before any overdrives. For different reasons, the most important of which is that it will track the best there.
Harmonizer pedals work by adjusting your pitch and should thus be used in the pitch shifter part of your signal chain. Which is located near the beginning of your signal chain.
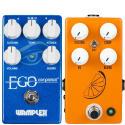
5. Drive Effects Pedal (AKA Gain or Dirt)
Drive pedals help increase the saturation or volume of your sound.
So, it should be somewhere in the middle of your chain. Ideally after the tuner, wah, and compressor.
But, before any modulation or time-based effect pedal, it will muddy up your sound.
Note: You can choose to have all or only one of these. Also, you don't have to stack and use them all, but if you do, here's the best order.
-
Fuzz Pedal -If you want to get the most out of your fuzz pedal, it must be placed early in the gain section. That is why fuzz pedals are usually found at the top of pedal chains.
Fuzz produces an aggressive sound, which can be smoothed out by an overdrive pedal.
-
Overdrive Pedal - An overdrive, when stacked before distortion, will saturate and crank the distorted gain of the pedal, much like a boost pedal. This pedal chain setup is great for thickening sound.
An overdrive pedal, when used after a distortion pedal, will enhance the output signal and change the overall tone of the effect. This will help a solo in cutting through a thick mix.
Overdrive pedals have a gentler crunch compared to distortion. Which is perfect for old-school rock songs.
-
Distortion pedal - By placing the distortion pedal after the overdrive, you can use the overdrive pedal to boost the gain of the distortion pedal. This will help in boosting overall sustain and volume, making it an ideal combination for solos.
Distortion pedals produce an enormous amount of gain, which results in clipping. This clipping is more aggressive in comparison to overdrive pedals.
Tip: Having both overdrive and distortion pedals on your board can be beneficial instead of choosing one over the other.
Especially if you're playing different styles of music or genres. This adds more range to your tone. You can use overdrive for more bluesy songs. While using distortion for more hard rock songs.
We've explained in more detail the differences between these gain pedals:
6. Modulation Effects Pedal
Modulation pedals can be placed all over the whole signal chain. But, most benefit from it coming later or at the very end of the chain, especially after drive pedals.
There are also some who prefer the modulation effects in front of gain. This way they achieve a more subtle effect. Compared to putting it after gain, where it produces more high-end sound.
Modulation effects pedals add depth and motion to your guitar's sound. Because of this, modulation pedals can completely change the character of your tone.
-
Tremolo Pedal - Tremolo pedals should come after the distortion and before the ambient effects.
This is because the tremolo will modulate the entire signal. Some people, however, prefer to start with impedance-sensitive pedals like fuzz.
A tremolo pedal modulates the volume of your guitar signal providing a rhythmic pulsing effect.
-
Flanger Pedal - Placing a flanger after the drive pedals ensures that it does not muddy the signal. Since it will eventually go into a pedal that will saturate it's signal.
The flanger effect duplicates an input signal and continuously alters the phase of one copy. Providing a rolling comb-filtering effect on the sound.
But, some players like putting it before drive pedals, because it would make the sound thicker.
-
Chorus Pedal - As mentioned earlier, we don't want the signal to get dirty even before going into the drive. So, we want to place it after the drive pedals, like the other modulation effects.
A chorus effect adds a beautiful depth to your tone that appears to be twice what you're playing. Sounding like a 12-string guitar, chorus effect pedals will sound extremely familiar.
-
Phaser Pedal - Overdrives, distortions, EQs, or filters should be placed before the phaser to ensure it can affect and enhance them.
A phaser is used mostly to create a movement to your tone, but it can also be used to add to individual notes or to simulate the sound of a rotating speaker. Phasers sound similar to flangers, but there are significant differences.
7. Time-Based Effects Pedal
At the end of the chain, it's time to add time-based effects. Placing it last ensures that the sound can be shaped by these time-based effects, without the other effects affecting it.
You want to do it this way to avoid a messy sound.
-
Delay Pedal - Delay before reverb gives ambiance to each repeated note, which fills up space.
Delay pedals will record and playback sound from the guitar signal. This creates a snappy repetition of whatever you just played on your guitar. It produces cascading walls of sound with long prolonged playback times. Making them ideal for creating ambient landscapes.
-
Reverb Pedal - Reverb comes last because it mimics and creates 'echoes' to make it sound like you are playing in a larger room.
Reverb pedals give your guitar sound a 'live' ambiance, even if you are playing in a studio or just in your bedroom. Because of this, reverb pedals can be skipped for live performances.
We've explained in more detail the differences between these time-based pedals:
Honorable Mentions
These pedals are also important in further shaping your tone. But, if you choose not to have these, you can opt not to have them on your board.
-
Noise Gate - A noise gate or noise suppressor removes any undesirable noise from your setup, such as a single coil pickup hum or high signal gain.
Noise gate pedals help in getting rid of excessive hissing and humming while from your setup. This is a typical issue when using high gain, which is why many heavy rock and metal musicians use noise gate pedals.
This is best put after gain pedals. This way, you can cut some clippings or hum from my distortion or overdrive.
For example, perhaps one of the pedals you are using is squeaky or has a really loud buzz. If you don't want this to be picked up, especially if you're recording audio, you'll want to use a noise gate.
And because of this, it moves around the signal path. You should place your noise gate directly after whatever pedal is causing background noise.
This means you need to listen to your sound and discover that for yourself.
-
Looper Pedal - Placing it at the end of your chain, will capture all the effects that were on at the time of looping. This also ensures that your recording will not be affected by changes you will make after.
A looper pedal is an electronic instrument that records a musical performance in real time and plays it back. This enables a musician to start overdubbing themself. Creating a large, polyphonic sound based on their performances in the venue. This is also useful for jamming alone with yourself.
Frequently Asked Questions
Is it OK to daisy chain guitar pedals?
Daisy chaining your guitar pedals will not harm your pedals. Daisy chain refers to a type of power supply that can singlehandedly power multiple pedals.
Just make sure to pay attention to the voltage requirements of your pedals.
Different pedals require different voltages, and using a daisy chain that only provides one type of voltage may not work for all of them. To avoid signal noise or damage to your power supply, make sure that each pedal is plugged into the appropriate voltage.
Does it matter what order your guitar pedals are in?
Yes, it does. Different combinations will yield different results in your tone. The order of your pedals is important because if you have multiple pedals, then the signal will be processed multiple times as well.
So, the pedals you put first will have the cleanest and purest signal. While the ones towards the end will receive a weaker signal. In the end, find your preference. We have different tastes in tone, and we can experiment to achieve our desired results.
What is an Effects Loop?
An effects loop is an audio input and output loop that is connected to your amplifier's Effects Send and Effects Return ports. It's after the preamp and before the power amp section. These can be labeled Preamp Out (Effects Send) and Power Amp In (Effects Return) on some amplifiers.
Not many amplifiers feature effects loops, but those that do allow you to loop parts of your effects. Typically, musicians will install their delay and reverb effects into their amp's effects loop. This is especially useful if you get your overdrive and distortion from your amplifier rather than pedals.
Otherwise, you'd be feeding your delay and reverb ambiance to your amplifier's overdrive and distortion. Which might sound muddy and washed out. For a different sound, you may also add your modulation pedals into your amplifier's effects loop.
What is the difference between a Buffered Bypass and a True Bypass Pedal?
True bypass is essentially any wiring design in which when a pedal is off, the signal channel runs directly from the input jack to the output jack. This eliminates obvious problems like power-line noise and hum. But, also more subtle issues such as interference caused by LEDs, LCD panels, or clock noise. Importantly, whether the pedal is on or off, a buffered bypass pedal preserves the buffer in the signal path.
Buffered bypass on the other hand is simply when an area of the circuit remains in the signal channel whether the pedal's main circuit is engaged or not. This has several advantages, such as the ability to create tails on delays and reverbs. But buffered bypass pedals can cause tone suck since they keeping some components of their circuit in the signal chain even when disengaged.
Another advantage is that you can preserve a consistent output impedance for the following pedals. Regardless of whether the main circuit is turned on or off. This can help to avoid variations in signal intensity and, at worst, blatant timbre shifts in your clean signal.
Final Thoughts for Best Pedalboard Setup
Using guitar effects pedals spices up the dynamic range of your sound. It helps shape your tone and define your identity as a guitarist. It encourages creativity, and fires you up to play more.
Here, I wanted to explain to you the reasoning behind common and the best guitar pedal order setups, in order to make it easier for you to get your effects pedals organized.
Now have fun, be creative, and don't be afraid to experiment with non-conventional pedal combinations.
Contributors:
Jerome Arcon - Co-writer