

DIY Vocal Booth - Our Quick Budget Solution To Great Sound
DIY Vocal BoothA DIY vocal booth is a practical solution for limiting sound reflections and external noises when recording vocals in home studio setups. |
When recording vocals in a home studio, it's crucial to eliminate ambient noise to achieve a high-quality recording. Many home studio owners assume recording in a closet or other enclosed recording space will suffice, but this is not necessarily true. The sound waves from ambient noise can still penetrate through the walls of the closet, and the result will be a recording with poor audio quality that cannot be fixed in post-production.
To avoid this, creating a DIY vocal booth is recommended to dampen the sound waves from ambient noise and provide a suitable recording environment. Several options are available, such as the mattress fort or the blanket booth, but choosing the right one for your specific needs is essential.
Some common choices for a Do It Yourself (DIY) vocal booth, such as the closet booth, can be problematic due to the materials used and insufficient soundproofing. Therefore, choosing the right materials and techniques for soundproofing is crucial to achieving the best possible recording quality.
Why Build A DIY Vocal Booth?
When recording vocals, it's important to ensure they stand out and are not drowned out by other sounds. This is especially critical in genres where bold and upfront vocals are necessary. However, this can be difficult to achieve if the recording is done in a room with no proper acoustic treatment, as the audio will reverberate and bounce around, creating a distant-sounding voice.
To prevent this, a well-designed vocal booth that absorbs sound is necessary. It acts as a vocal isolation booth by removing the room sound and keeping the vocals dry and clear, ensuring they are upfront and center. This creates a clean and professional sound essential in the music industry.
Can't I Just Fix It In The Mix?
Although the process of mixing vocals can help mitigate some recording issues, it cannot miraculously transform a subpar vocal recording into a high-quality one. Therefore, it's crucial to prioritize impeccable recording quality instead of relying solely on post-production techniques.
Even with advanced mixing techniques, it's impossible to eliminate reverb from poorly captured vocals. Thus, if the initial recording quality is inadequate, the desired upfront vocals cannot be achieved.
It's worth noting that even the most skilled production team cannot compensate for low-quality recording. However, creating a basic DIY recording booth is a simple task that can significantly enhance the recording quality.
Cheap DIY Vocal Booth Options
Creating the best DIY vocal booth effectively achieves high-quality vocal recordings without breaking the bank. Even a simple vocal booth DIY can drastically improve the clarity and prominence of vocals in your recordings.
In this guide, we'll explore some of the most effective and popular DIY booth methods suitable for a home recording studio. We'll delve into what works, what doesn't, and what to avoid. By the end of this guide, you'll be equipped with the knowledge to design your own vocal booth and ready to record your vocals with professional-level quality.
Building Your Own Vocal Booth In The Closet
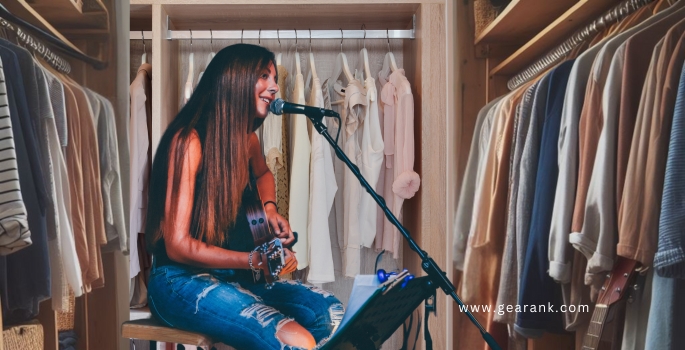
Recording vocals in a closet is popular among musicians for home recording. The belief is that the small space will provide minimal sound and result in better vocal recordings. However, the reality is quite different. Although the closet is small, it is rarely well-insulated, which leads to muffled and dull sound quality.
Despite the reduction in reverb due to the small space, the lack of muffling materials leads to the reflection of sound waves back to the microphone. Increasing the number of clothes in the closet is not a practical solution. The outcome is an inferior quality vocal recording with a dull and small sound, lacking the desired clarity.
Can A Closet Improve Vocal Recordings?
There is a popular belief that recording vocals inside a closet can yield good results. However, the comfort level of recording in a closet might not be ideal.
The structure of each closet differs, and some might have thicker walls and clothing, which can impact room acoustics.
Recording in a closet can be a feasible option in case of an urgent need. But for professional-quality recordings, there are other options than relying on a closet as the primary choice.
If you have a sufficiently large closet, a DIY closet vocal booth adaptation could be a good option for you.
Building A Mattress Fort Vocal Booth
The mattress fort vocal booth is a rudimentary solution for recording vocals that involves stacking multiple mattresses to form an enclosed space. Despite its simplicity, it can effectively absorb reflections and mid to low-mid frequencies, resulting in a well-balanced vocal sound.
However, the primary drawback of using a mattress vocal fort is difficulty setting it up. Mattresses are bulky and heavy, and arranging them properly to achieve a high-quality recording is cumbersome. Moreover, the setup process can be time-consuming, which can significantly annoy professionals who need to produce recordings regularly.
The mattress fort vocal booth is a viable option for occasional use, especially if portability is crucial. However, it may not be the most practical choice for those who require regular vocal recording due to its setup difficulties.
What Type Of Mattress Is Good For A Vocal Booth?
Memory foam mattresses are recommended to build a reliable and effective mattress vocal booth. Mattresses made of memory foam are known to provide superior sound absorption compared to traditional spring mattresses.
This is due to the memory foam's thicker and denser padding, which helps minimize sound reflections and provide a clear and precise audio recording. Thus, if your diy home vocal booth plans include constructing a recording booth, opt for memory foam mattresses rather than spring mattresses, especially if you want to achieve professional-level sound quality.
How Do I Build A Mattress Fort Vocal Booth?
Constructing a mattress fort to absorb on-axis and off-axis reflections can be a simple yet effective solution for recording vocals. The shape of the fort depends on the number of mattresses available.
For a single mattress, placing it behind the singer at an angle can help absorb on-axis reflections. Experimenting with different angles can help find the optimal position.
Arranging two mattresses in a V-shape behind the singer can help with off-axis reflections.
For three mattresses, creating a bracket shape by placing one at the back and one on each side can capture significant reflections.
However, the ideal number of mattresses for optimal isolation is four. Placing one behind, one on each side, and one on top, acting as a roof, provides an almost entirely enclosed space. High-density mattresses should be used for maximum vocal isolation.
After recording, there will be four mattresses, but the result will be exceptional vocals.
Building A Blanket Fort Vocal Booth
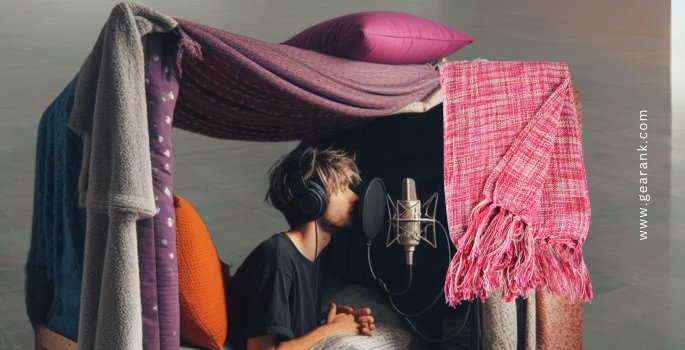
The vocal booth made from several acoustic blankets differs from your average makeshift structure.
If you're interested in building one, look at how it is done.
Gather Your Materials
You'll need a few basic materials to construct a blanket for the vocal booth. The first requirement is PVC pipes that even novice DIY enthusiasts can quickly assemble.
Secondly, you'll need thick and densely woven blankets to absorb sound effectively. While heavy-duty moving blankets can be a budget-friendly option, acoustic sound absorbing blankets are the most effective and premium alternative.
Before gathering your supplies, it's essential to sketch out the design of your sound booth and take precise measurements to purchase the right amount of PVC pipes and blankets.
Additionally, it's crucial to calculate the number of blankets required since every angle of your recording booth needs to be covered for optimal results.
Construct A PVC Frame
Let's focus on building the frame for your portable vocal booth. While you can experiment with complex designs, I recommend sticking to a simple cube structure.
This will make it easier for you to collapse the booth without any frustration at the end of the day. Slot the pipes together to construct a cube enclosing the singer and the microphone.
Drape Your Blankets
The concluding phase of constructing a DIY sound booth involves installing acoustic blankets over the PVC frame.
It is crucial to ensure no gaps are left to prevent sound energy leakage through even the smallest cracks.
Overlapping several acoustic blankets is recommended to provide extra insulation. Additionally, placing a blanket on the floor will be an additional barrier for sound wave reflection.
Advantages Of The Blanket Vocal Booth
The blanket fort is an excellent and practical solution for creating a vocal booth on a budget. It boasts portability, collapsibility, and effectiveness, making it an ideal option for those who are into the mobile recording process, and those who use a mobile recording setup.
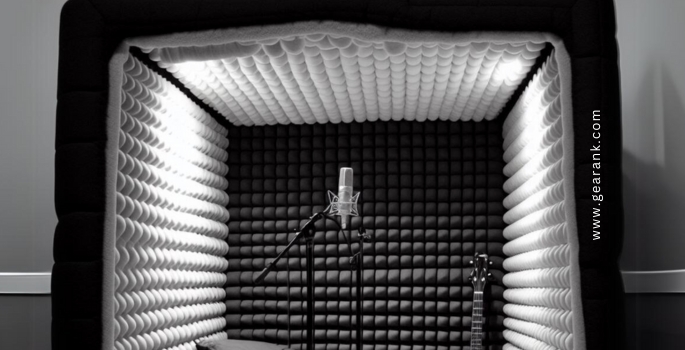
Building A DIY Recording Booth At Home
For those passionate about producing high-quality vocals, constructing a mini recording booth can be a wise investment. This will require a good vocal booth design, with solid walls, built as a permanent fixture in your house, can help ensure you capture clean vocals free from any unwanted noise or interference.
Gather Your Materials
-
Timber. A heavier wood like pine will absorb sound better. Ensure it's good quality with decent weight.
-
Acoustic plasterboard. It is recommended to use acoustic plasterboard instead of regular plasterboard for soundproofing.
-
Wool insulation. The wool insulation amidst the plasterboard walls creates a thick barrier.
-
A heavy door. Limit the movement of sound waves by installing a heavy door where you enter and exit the vocal booth.
-
Acoustic foam tiles. The heavy tiles on the final insulation layer are designed to deflect and trap a range of frequencies, helping to create a balanced sound.
-
Acoustic mastic. This material can be used to fill any gaps you may find in your booth.
-
Neoprene door seal. The door seal works like a mastic to prevent sound from leaking through.
Choose A Location For The Vocal Booth
Before building your frame, you need to decide where to put it. Remember, this is a permanent construction. So, spend some time settling on the right location.
Your DIY recording booth should be placed in the corner of a room with a low ceiling. You do less construction work as the corner walls and ceiling form part of the booth.
However, thicker walls are best for sound quality. Choose an area with solid walls to block as much excess audio as possible.
This is a permanent addition to your home, so let's be honest: the booth will go where you have room. Don't overthink the positioning. Even the basic construction will improve recording quality.
Build A Basic Frame
For those with technical expertise, constructing a DIY soundproof vocal booth should be straightforward. However, it's worth noting that this is a permanent installation that requires a high degree of precision. As such, consider enlisting the help of professionals.
The first step involves installing a timber frame. This frame must be flush with the wall, leaving adequate room for wool insulation. Once the frame is securely in place, carve out gaps to accommodate wiring and cables. These gaps will be filled in later.
Add Plasterboard
It's important to use acoustic plasterboard and acoustic wool insulation to achieve proper soundproofing. The insulation should be placed between the plasterboard walls within the frame. To ensure a tight fit, use acoustic mastic to line the edges of the plasterboard and fill any gaps.
Install A Door
It is essential to use a heavy door equipped with neoprene foam strips to ensure effective sound isolation in a vocal booth.
This will help to create a tight seal that prevents ambient noise from entering the booth and vocal sound from leaking outside.
To achieve optimal sound isolation, it is crucial to take precise measurements and ensure the door fits perfectly in the frame.
Line The Interior of your DIY Foam Vocal Booth
Acoustic foam tiles with high density can provide enhanced control over sound quality. These acoustic panels are designed for sound absorption and isolation, producing excellent vocal clarity.
While this is nearly the final step, it is a crucial one. Therefore, investing in high-quality acoustic tiles and ensuring a secure attachment for optimal results is recommended.
Fill The Gaps
The last stage involves filling any remaining gaps in the booth, particularly the ones created for cable installation.
For this purpose, I recommend using a sealant to ensure a complete fill-up. However, before sealing the gaps, it is advisable to perform a test run of the booth.
This will help you identify any recording equipment that needs relocation, which may necessitate creating new holes. Once you are satisfied with the setup, proceed to seal the gaps.
What DIY Recording Booth Is Best For Vocal Sound?
The most effective DIY home studio vocal booth for recording high-quality vocals is a solid sound booth made of acoustic plasterboard walls, mineral wool insulation, and acoustic tiles.
The DIY vocal booth construction layers of materials help capture reflections and effectively isolate sound, resulting in clear and powerful recordings.
However, building this booth type requires significant effort and expense, making it the least practical option for most DIY projects. Only those with the necessary expertise in materials and construction should attempt it.
An alternative and popular DIY build is the blanket fort, which is easy to assemble, practical, and produces quality sound—with a few basic items, creating a sound-absorbing environment that can be easily dismantled and stored away when not in use is possible.
Can Reflection Filters Replace A DIY Vocal Booth?
While reflection filters are commonly used in vocal recording, there may be other solutions for reducing reflections. A reflection filter is positioned behind the microphone to minimize off-axis reflections. Although it can provide significant benefits in some instances and with specific vocalists, there are more complete solutions.
It is recommended to use an extra thick material behind the singer's head instead of a reflection filter placed in front to achieve the best possible results in vocal recording. An acoustic tile behind the singer can provide better sound absorption and reduce unwanted reflections.
In some cases, reflection filters can be used effectively to achieve a desirable sound, mainly when working with a DIY mattress booth. However, it is essential to note that the reflection filter should be viewed as a supplementary component in most vocal booths rather than a complete replacement for other soundproofing measures. A completely soundproof studio space is ideal.
Conclusion
A vocal recording booth is essential for limiting sound reflections and external noises, resulting in clear and upfront sound recordings. While professional sound booths are expensive, a DIY solution can be an effective alternative to ensure home-recorded vocals sound professional.
One of the simplest and most cost-effective DIY solutions is to create a recording booth using a combination of a moving blanket and a PVC pipe frame. The moving blanket can be a sound barrier, while the PVC pipe frame provides structure and support. Alternatively, placing a mattress behind the singer's head can significantly improve sound quality.
By implementing these solutions, you can create a DIY vocal booth to help you achieve studio-quality sound recordings from your home. So, are you ready to take your recordings to the next level?
Frequently Asked Questions
Do DIY Vocal Booths Work?
Constructing a DIY vocal isolation booth can significantly improve the quality of your recordings by isolating the microphone and reducing reverb. Pair this with DIY acoustic panels for the control room, and you have a decent home studio setup.
PVC pipes and acoustic blankets can create a simple and effective booth. Alternatively, placing a mattress behind your vocalist can help limit room sound. While imperfect, these solutions can produce upfront vocal recordings with minimal room interference.
Are Closets Good Vocal Booths?
Although a tiny room like a closet may be a viable option for a vocal booth, it is not a good vocal booth due to its limited frequency attenuation and poor insulation.
While it may attenuate some frequencies, the lack of proper absorption will result in unwanted reverberations and other acoustic artifacts if the door is left open. If closed, it will be uncomfortable.
Therefore, it is recommended to use a dedicated vocal booth or a sound-treated room for optimal results. However, if no other options are available, a closet can temporarily be used to record vocals.
How Much Does It Cost To Build A Sound Booth?
Acquiring a professional vocal booth can be expensive, with costs ranging from $1000 to several times that amount. Achieving complete isolation of room sound for superior audio quality significantly contributes to this cost. Nevertheless, you can construct a DIY vocal booth that can offer a comparable level of performance at a fraction of the price.
Contributors:
- Alexander Briones - Editor
- Jerry Borillo - Illustrator


